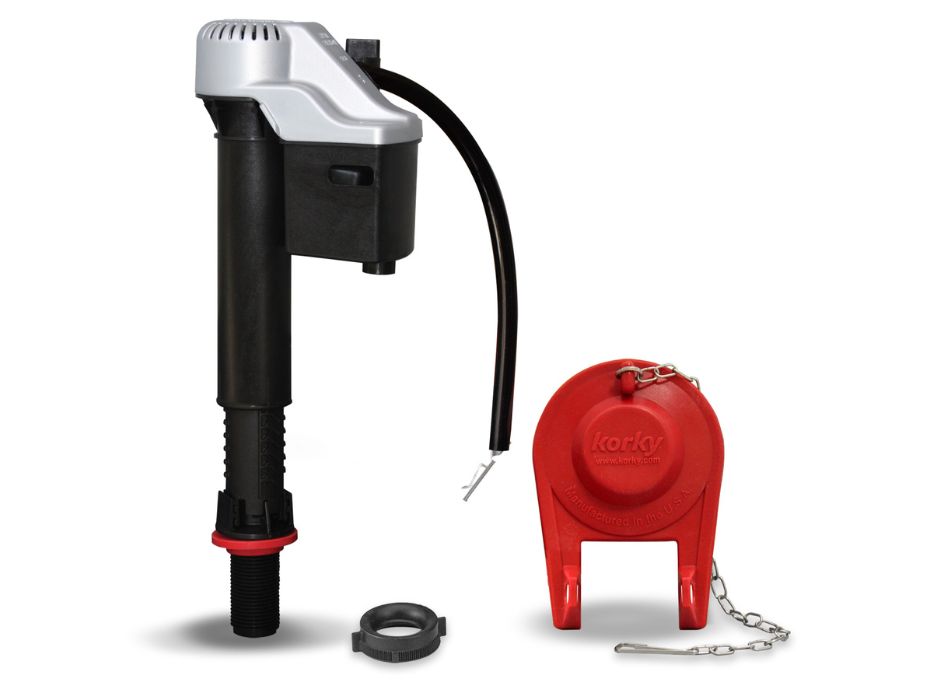
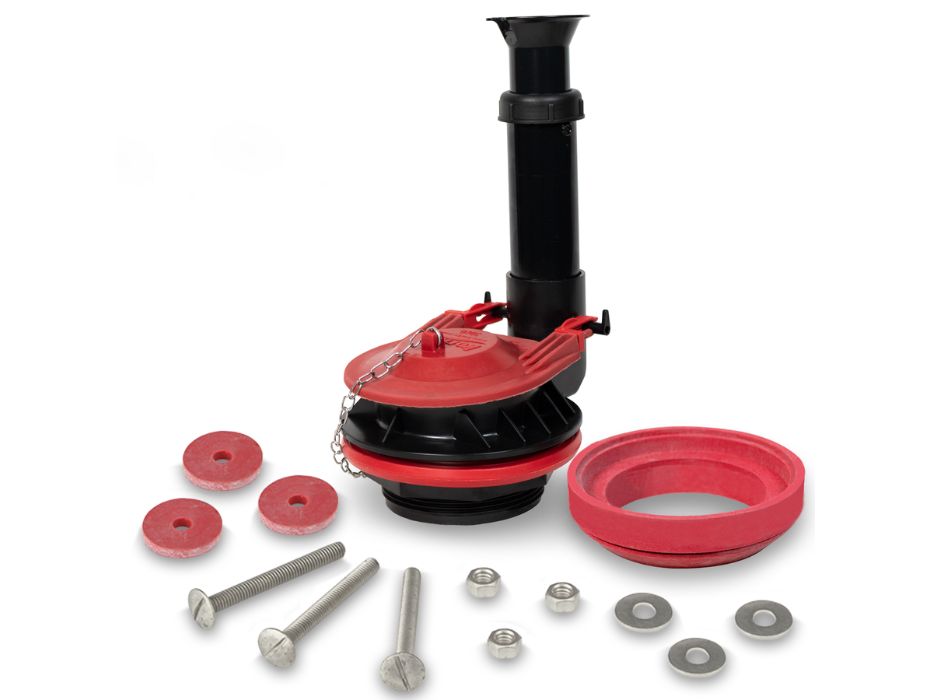
How to Replace Toilet Fill Valve

Is learning how to replace a toilet fill valve on your to-do list? Replacing a toilet fill valve is a normal maintenance that needs to be done occasionally to keep your toilet running smoothly.

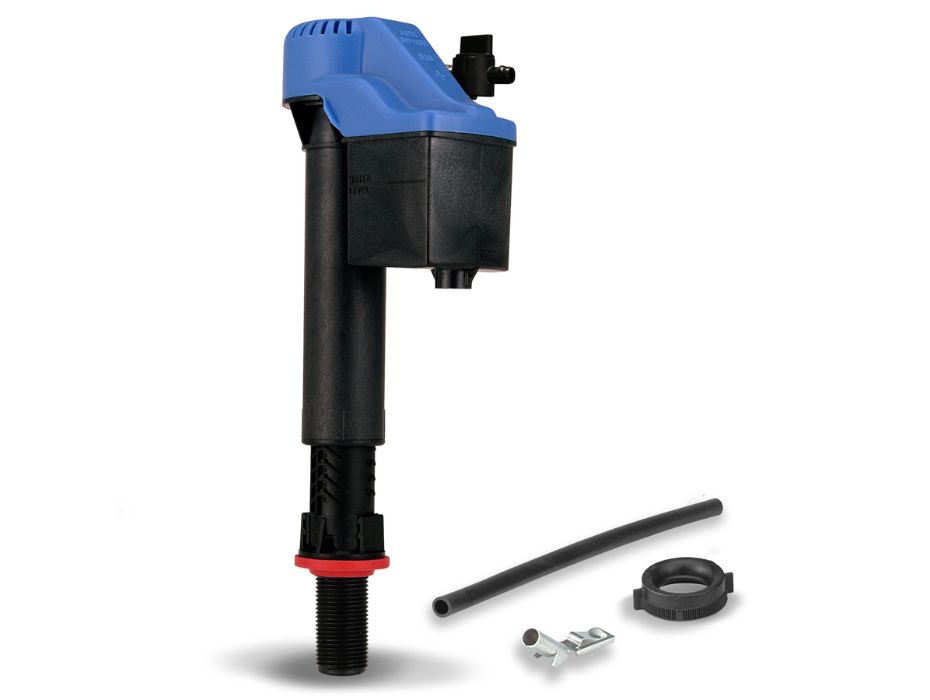
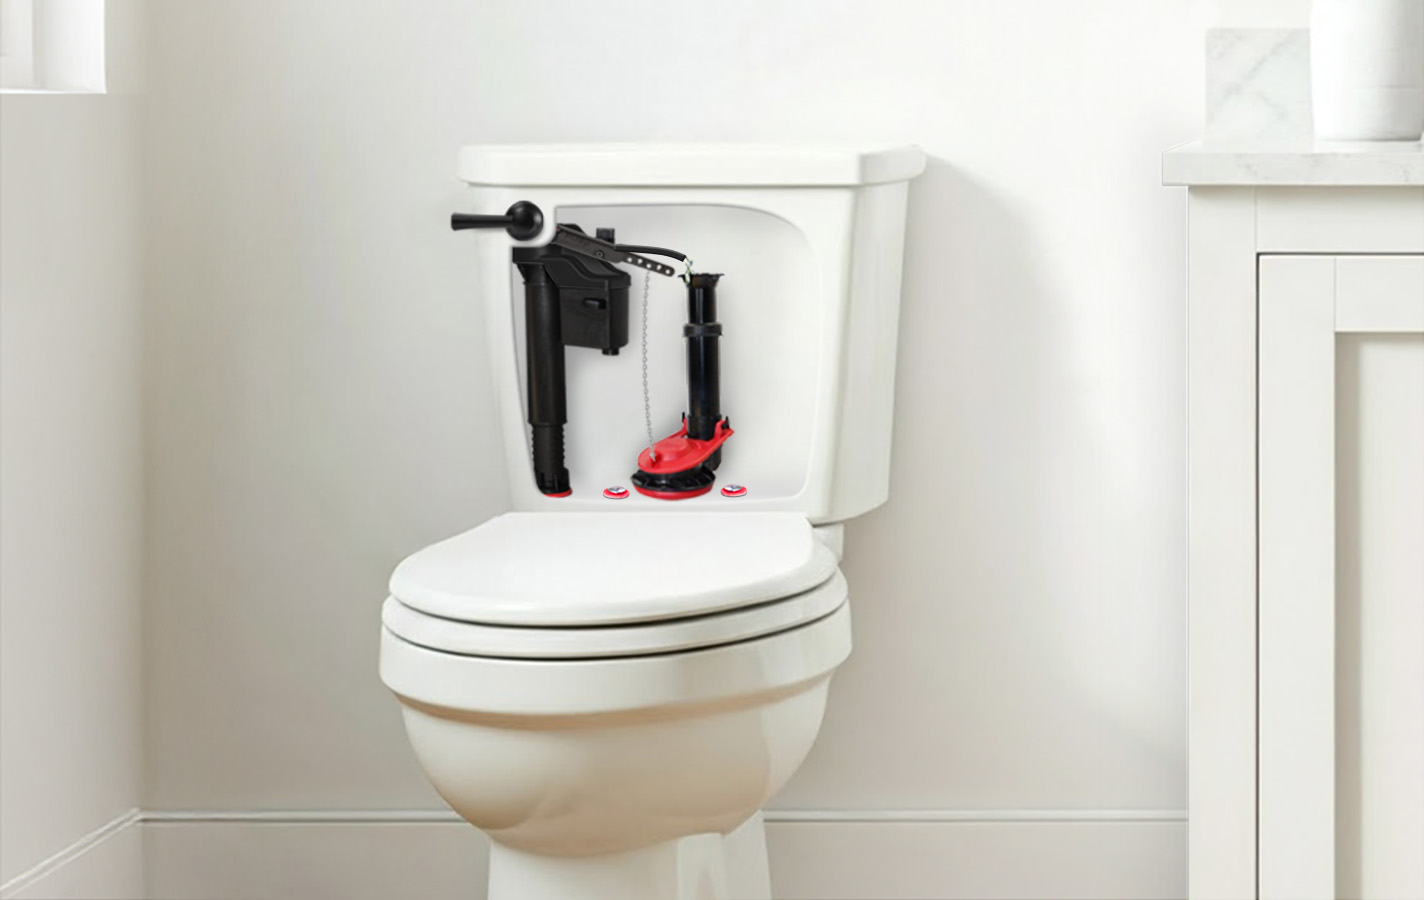
Fill valves typically have a lifespan of 5-7 years, depending on the type of water you have. Some water sources carry sediment that can build up internally, causing it to run inefficiently.

Installing a fill valve in your toilet might seem challenging, but it is very simple!
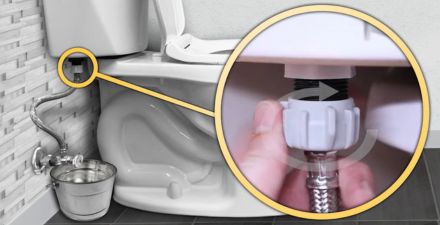
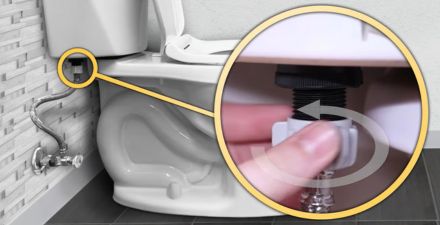
Does this describe your toilet issue?

How to Install Fill Valve

Confirm You Have the Right Fill Valve

There are many different fill valve models on the market and they all look a little different. Buying a universal Korky fill valve model is a safe choice, as Korky fill valves fit 99% of toilets.

Korky fill valve models are unique because they have an internal float and are fully serviceable. If you already have a Korky fill valve, try reading our guide about How to Service a Korky Fill Valve for more information. 

If you need to replace your fill valve and want to double-check for compatibility, try using our Toilet Genius AssistantSM.

Shut off the Water Supply

Start the replacement process by turning off the water supply. To do this, turn the valve counterclockwise to the off position. 

The easiest way to remove the water in the tank is by holding down the flush handle until as much water is drained as possible. 

We recommend using a sponge to remove the leftover water from the bottom of the tank.

Remove the Old Fill Valve

Before removing the old fill valve, please note that water will be in the supply line.

Disconnect the water supply and remove the mounting nut by turning it clockwise. Once the mounting nut is removed, simply lift the old valve out of the tank.

Adjust the New Fill Valve's Height

Having the correct height for your fill valve is one of the most important steps of the installation process, as the height of the float determines how much water fills the tank.

If your fill valve is too high, it will constantly fill the tank with excess water and drain into your flush valve's overflow tube. If it is too low, there will not be enough water in your tank to adequately flush the waste.

To adjust the height of a Korky fill valve, hold the bottom, and twist the top of the valve counterclockwise to the unlocked position.  Then slide the fill valve up to extend.

Next place the fill valve into the tank hole and push down on the top of the fill valve until the water level mark is about 1/2 inch below the top of the flush valve overflow tube. The water level mark is stamped on all Korky fill valves.

Once you confirm that the fill valve is adjusted to the correct height, remove the valve from the tank and lock it by twisting the upper half clockwise. The ribs will line up with the pegs.

Install the New Fill Valve

Place the fill valve back into the tank hole at a 45-degree angle from the back of the tank. This ensures the refill tube will have a straight path to the overflow tube.

Once the fill valve is at the proper angle, the next step is to install the mounting nut. Install the mounting nut with the beveled side up. Be sure to hand-tighten only.

Attach the Refill Tube

All Korky fill valves come with a metal clip that attaches to the end of the refill tube. Most toilets with a standard flush valve overflow tube will use this clip, but different flush valve systems might require a different attachment method.

Some Kohler® flush valve towers will require a clip, and some require the tube to be pressed into the opening on the top of the tower. 

Mansfield® tower-style flush valves will require the tube to be placed into the top without the clip, with one-half inch of clearance between the end of the tube, and the hole on the top..

Reconnect the Water Supply

Connect the water supply to the bottom of the fill valve under the tank. Hand-tighten this part only and avoid using sealants or tape. Once the supply line is attached, turn the water supply on. 

Water can flow from three different areas on a Korky fill valve, the first being the refill tube, the second being the top of the cap, and the third being the base. If you notice water is flowing from these three areas, there is no need to panic, the fill valve is working as intended. 

If you have the standard 528 (white cap) or 528T (blue cap), congratulations, you’ve successfully installed a Korky fill valve!

If you have the 528MP (silver cap), 528GT (blue cap), or 528X (black cap), your fill valve has a refill adjuster dial. Turn this dial to open by turning it clockwise and proceed to the final step.

Adjust the Refill Settings

Adjusting the refill settings on your fill valve is an important step, as it will ensure that the right amount of water is supplied to the bowl. If this setting is not fine-tuned, you could waste extra water, costing money over time.

Start the adjustment process by flushing your toilet and waiting for 2 minutes. This will allow the bowl water level to settle to the toilet’s original settings. After two minutes, mark this water level with a pencil or dry-erase marker.

Once your water level is marked, flush the toilet, and observe the timing for when the water in the bowl reaches the line, and when the fill valve shuts off. 

If the water fills to within ½ inch of the pencil line, no further adjustments need to be made. If it fills short of the line (you need more water) turn the dial clockwise to increase the flow. If it fills over the line (you need less water) turn the dial counterclockwise to reduce the flow.

This process might take a few attempts, but with some fine-tuning, your Korky fill valve will be installed and perform at your toilet’s most optimal settings.

how to install 528x video thumbnail528 Install Video Thumbnail